Installing Lightroom presets might seem confusing at first, but this guide will walk you through the process step-by-step. In addition to learning how to install Lightroom presets, we will go over how to create your own and export them to your computer as well. You can click on each example photo below to view it at full size.
How to Create Adobe Lightroom Presets
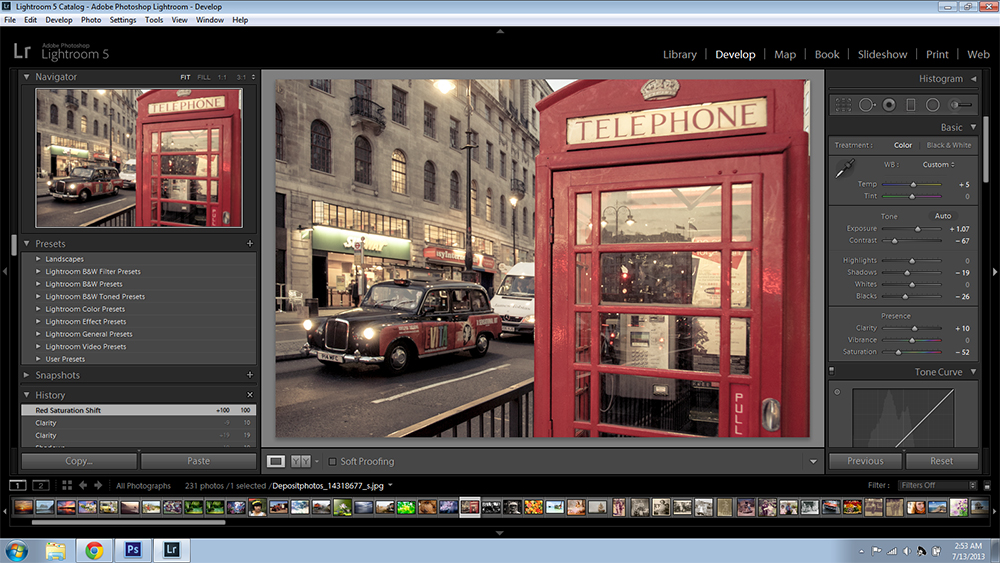
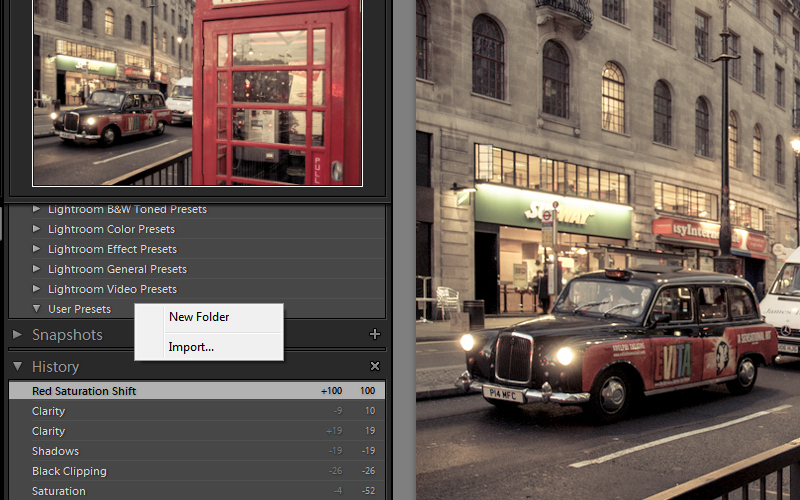
To create a Lightroom preset, you would first need to adjust a photo using the sliders and other adjustments on the right hand-side of the Develop Module screen. This screen-shot shows a photo that has been adjusted with a sample set of settings.
Once you are satisfied with your adjustments and want to be able to save it as a preset that can be applied to future photos, you are ready for the next step. Click on the “X” next to the word “Presets” on the left side of the screen as shown in this screenshot.
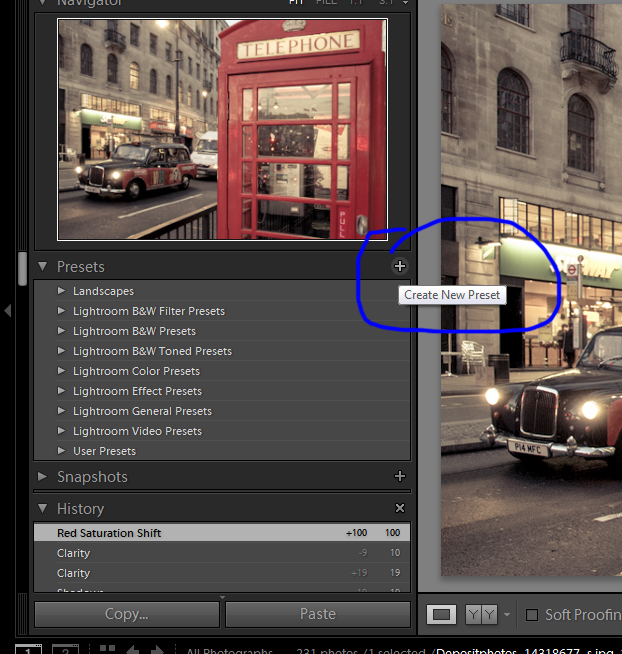
After clicking on the “X” a new screen will pop up. You can name your new preset and uncheck any boxes for adjustments that you don’t want to be applied. However, most of the time you will probably want to leave everything as-is. Click “Create” once you have named your preset. You new preset will now appear under “User Presets”.

You can now apply your newly created preset to future photos.
How to Export Lightroom Presets
If you would export and save your presets to your computer for sharing or storing, this can easily be done. For this tutorial, we will use the sample preset that was just created.
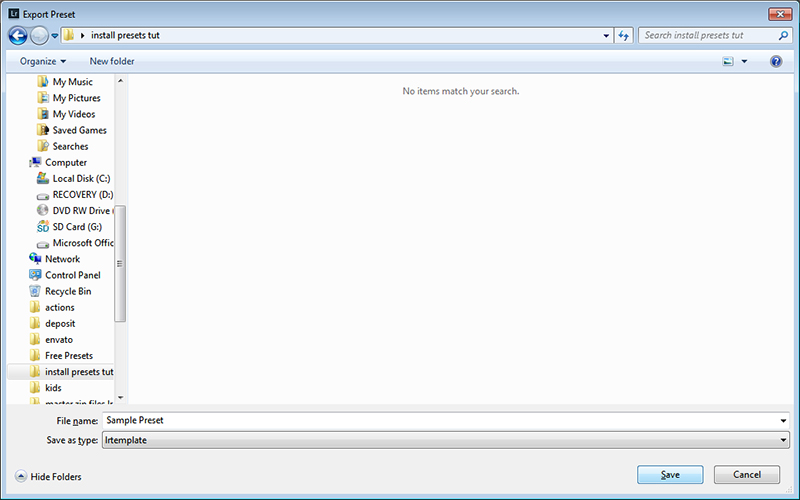
As shown in this screenshot, right-click on the preset you would like to save and click “Export”. A screen will pop up prompting you to name your preset. Once you have done so, browse to where you would like to save the preset and then click “Save”. All done!
If you delete the preset from Lightroom but decide later that you want to use it again, you can follow the instructions coming up next for importing Lightroom presets.
How to Install Lightroom Presets
Installing or “importing” Lightroom presets can be done very quickly and easily. I’ve gone ahead and deleted our sample preset from Lightroom so that I can show you how to install it again.
First, right-click on “User Presets” and click on “Import” as shown in the screenshot.
A window will pop up which will enable you to browse to wherever you have your preset saved on your computer.
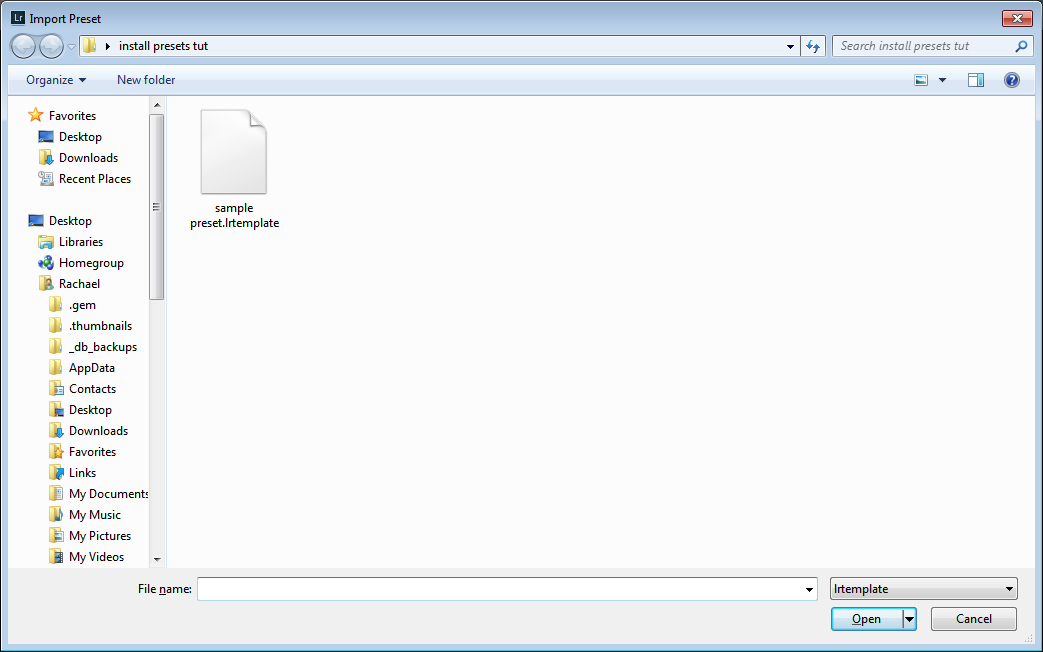
Select the preset and click “Open”. If there are multiple presets in the same folder on your computer that you would like to import, you can select them all and then click the “Open” button”.
The preset(s) will show under “User Presets” once again.
Please don’t hesitate to contact us with any questions you might have on how to create, save (export) or install (import) Adobe Lightroom plugins.
We are always glad to help!
Happy Lightrooming.