This post is a comprehensive collection of Topaz Labs tutorials which will cover every Topaz Labs product.
If you have not tried any of the Topaz Labs Photoshop Plugins yet, you can download a free and fully functional trial version of all of them from the Topaz Labs website.
Topaz Labs has an amazing set of Photoshop plugins that will give you amazing creative control over your photography. If you don’t have Photoshop, you can still use the plugins by downloading PhotoFXlab, which will allow you to use all of the plugins within a standalone application.
They also offer a free download called Fusion Express, which enables you to use Topaz Labs software from Lightroom, and iPhoto.
Each of the plugins can be downloaded separately, or you can purchase the bundle, which gives you access to all of the Topaz plugins and saves you a full $361!
You can click on any image below to view it at full size.
How to Open Topaz Labs
First, download and install the plugin(s).
If you are using Photoshop, you can open Topaz plugins by going to “Filter” and then choosing “Topaz Labs” from the drop-down menu. Your installed plugins will appear.

To open the plugins in Lightroom, first download and install Fusion Express or photoFXlab. Then open Lightroom. Right-click on the photo that you want to work on. Choose “Edit in” and then choose either Fusion Express or photoFXlab.

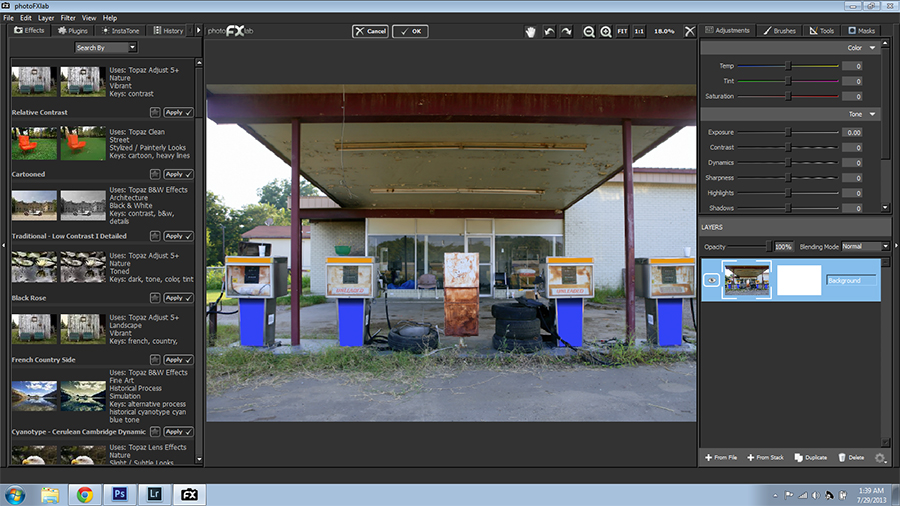
While in photoFXlab, you can open any of the plugins on the left-hand side of the screen. You can also use it in place of Photoshop or Lightroom to make some basic photo adjustments and work in layers.
How to Save, Install and Export Topaz Labs Presets
You can make your own presets in most of the Topaz Labs plugins. You can also import them from your computer or export them from the plugin to your computer. All three of these functions can be done from the same place as shown inside the red circle in this screenshot.

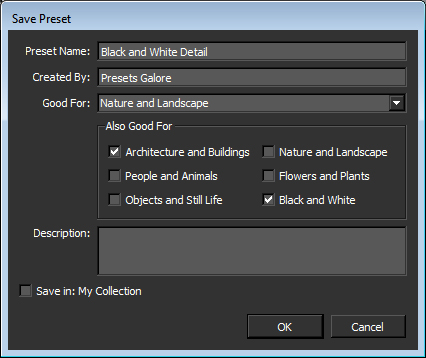
To save a preset, first make all of the adjustments you need to make to your photo. You can then save this exact set of settings as a preset by clicking the “Save” button. A small window will pop-up prompting you to name the preset and fill out any other information that you want. I typically uncheck the “Save in: My Collection” box. Once you have named the preset and click the “OK” button, it will appear in the list under “Presets”.
You can click the “Import” button and browse to where you have presets saved in your computer and install them.
The “Export” button will allow you to save selected presets as a file to your computer. This way you can share them with others, or just store them for later use if you have many of them and don’t want them all to appear in the list at once.
Topaz Adjust
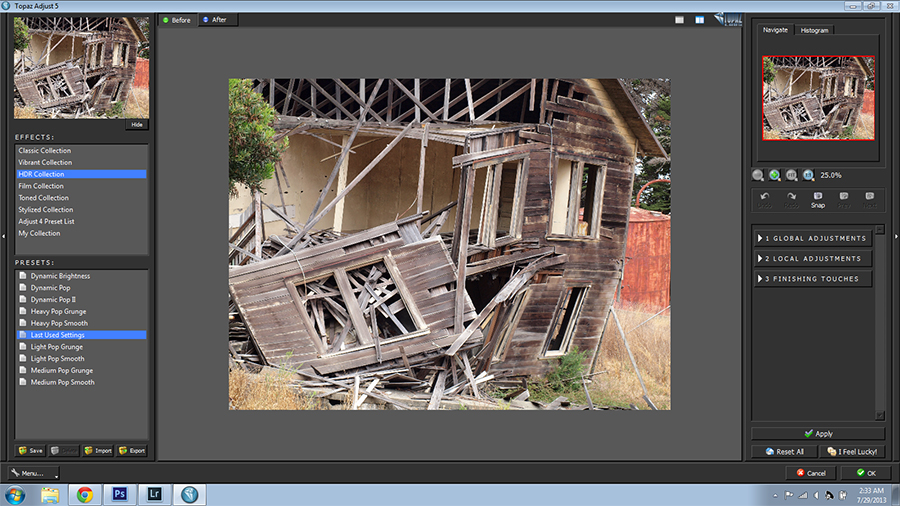
Topaz Adjust can create some great faux HDR effects by expanding dynamic range. It’s a great tool for overall detail enhancing and creative color effects. Like all of the Topaz plugins, it comes preinstalled with a set of presets. However, you can save settings and make your own presets.
Like many of the Topaz plugins, if you are feeling playful, you can click the “I Feel Lucky” button. The results can range from ugly and strange to downright amazing. You never know what you’re going to get!
Here is a random result from the “I Feel Lucky” button.
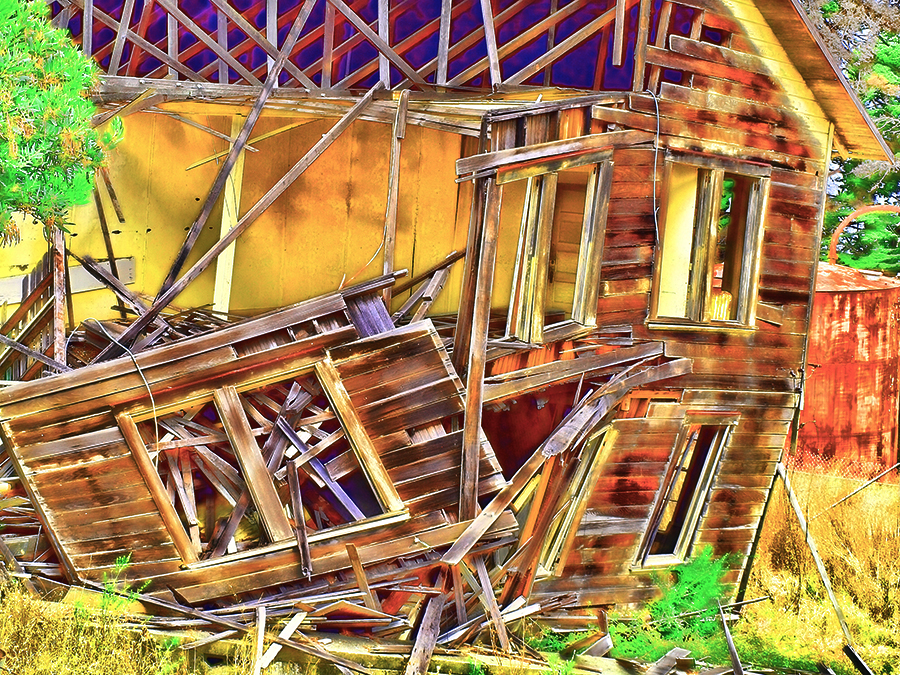
Whether you start with a preset or not, you can make all the adjustments you want on the right side of the screen. To make this Faux HDR result, I started with the “Heavy Pop Smooth” preset and then turned up the details and the saturation a bit.

Topaz Clarity

Topaz Clarity enhances contrast subtly to dramatically without added noise or halos. In my experience, it is superior to all other image-editing software at this. You can apply the adjustments to the the entire photo, or mask off specific areas that you want to enhance.
For example, if you want to enhance an architectural scene, but don’t want to change the sky, you can easily do so.
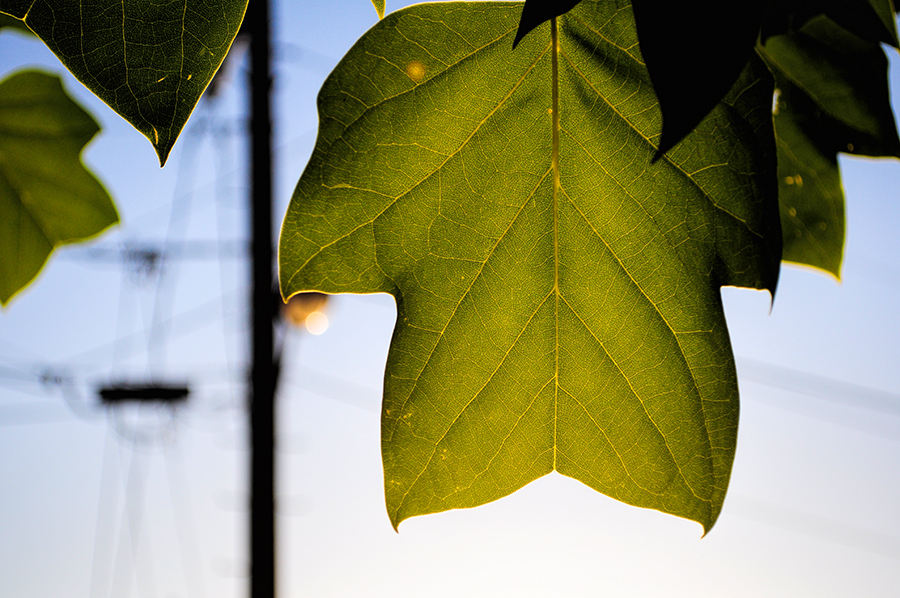
Here is a photo I took of leaves against a sky with some telephone poles and a subtle sun-flare in the background. It was a nice photo to start with, but Topaz Clarity really made it pop. I increased the level of detail and contrast as well as the saturation.
I applied the effect to the entire photo, without masking any areas off. You can see that there are no halos in the sky, which would be a problem in Photoshop or HDR software such as Photomatix.
Topaz B&W Effects

Topaz B&W Effects will convert your color photos to black and white and give you complete creative control over toning, transparency, exposure, color filters and more.
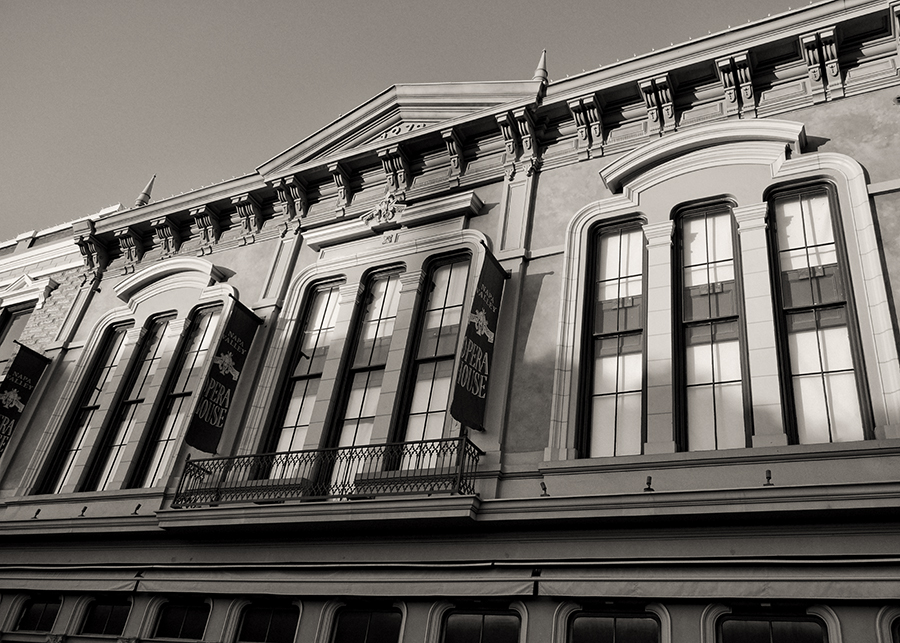
You can remove all color, add traditional film tones, cross-processing and other effects such as borders. As you can see in the above screen-shot, which is a photo I took of the Opera House in my town, you can remove most of the color but have any amount of the original image showing through. You can then add toning and cross-processing effects for a unique color result.
Here is the same color photo, which was originally rather vibrant in color processed in Topaz B&W Effects. I started off with a preset to get the photo close to what I wanted the end result to be, and then tweaked some settings on the right-side of the screen.
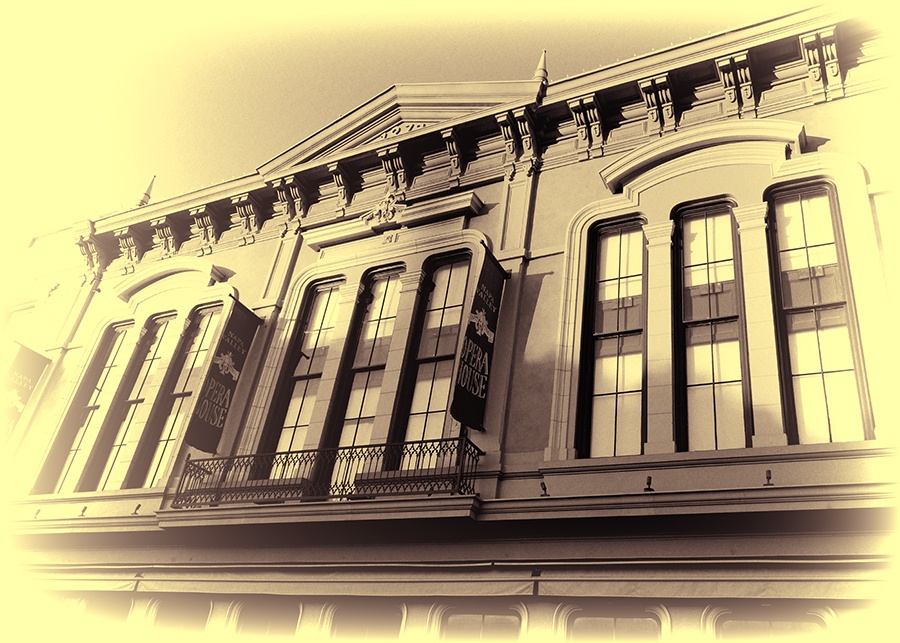
Here is the same photo processed with a more traditional black and white toned film look.
Topaz Lens Effects
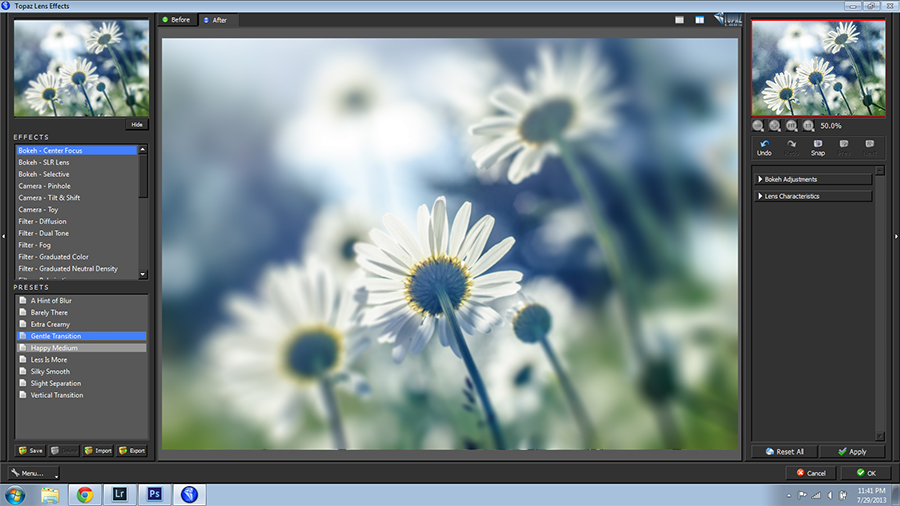
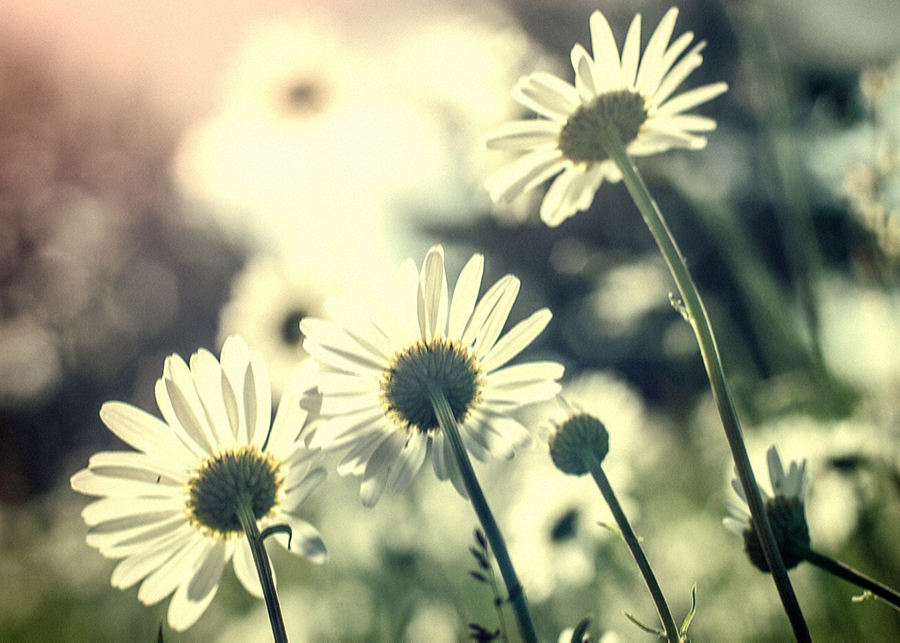
Topaz Lens Effects will give you the ability to create realistic lens effects such as bokeh, diffusion, vignette and neutral density to name a few. The above photo was given a bokeh effect using one of the presets that come preinstalled with the plugin.
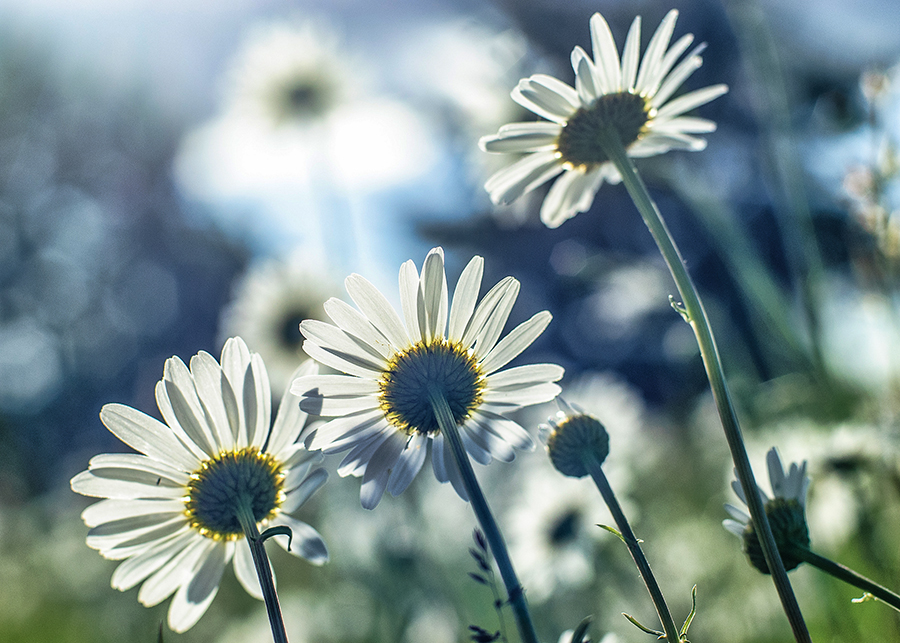
Here is another example using one of the toy camera presets.
Here is another photo example using a UV haze reduction preset.
Topaz Remask
Topaz Remask is a masking tool that enables you to easily remove pieces of your photographs. You can extract elements such as hair and foliage, which is typically really hard to do in other photo-editing software.
This is the only Topaz plugin that probably needs more of a step-by-step tutorial, since the others are so immediately intuitive and Remask isn’t. It’s not hard to learn however. You just need to get a grasp of the basics.
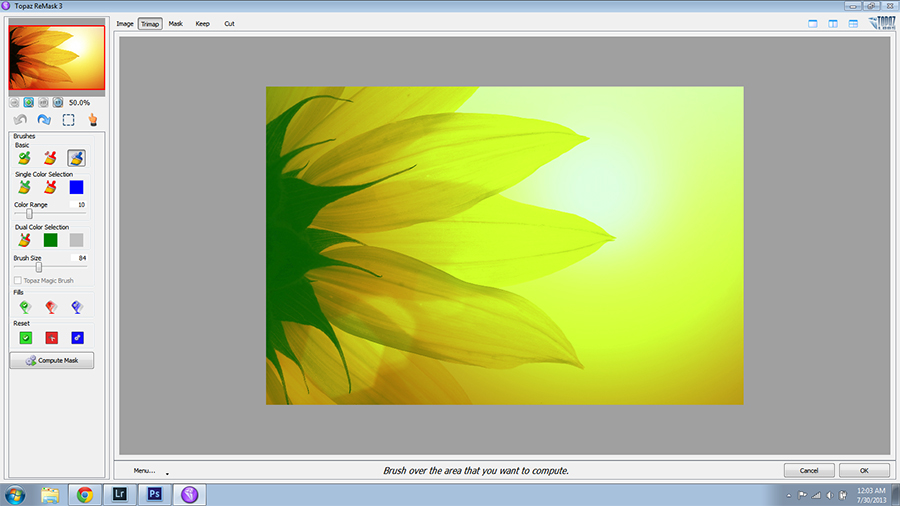
Once you have a photo open in Topaz Remask, you will notice that there is a green tinge overlaying your photo. This is how it’s supposed to look.
Along the left-hand side of the screen are the tools that you can use to cut or mask an object out of the background.
In the upper right-hand corner are different viewing modes, so you can see the image as-is or perhaps as a side-by-side comparison.
You would first make sure the blue brush is selected, and then you run your brush along the edges of the object that you want to extract from the background. This basically tells the software what you actually want to compute for removal.
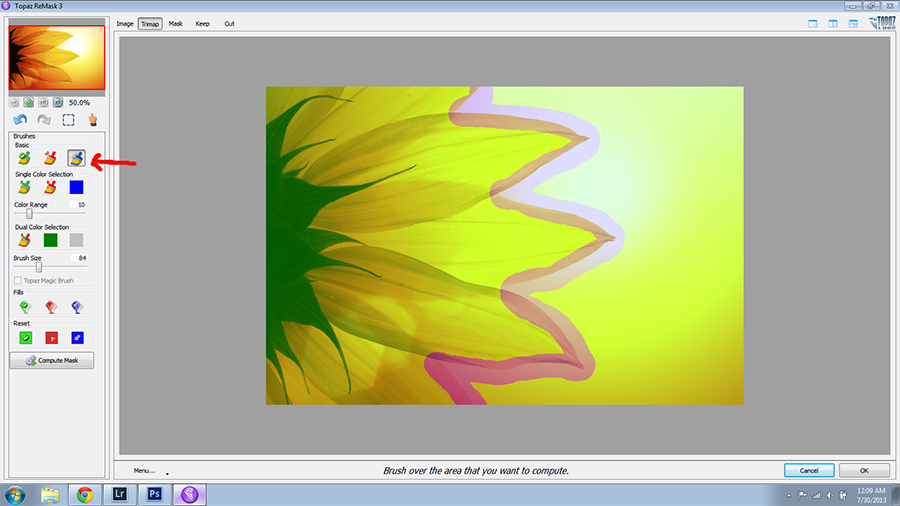
The green area is everything that you want to keep in the image.
Blue is what you want Remask to compute.
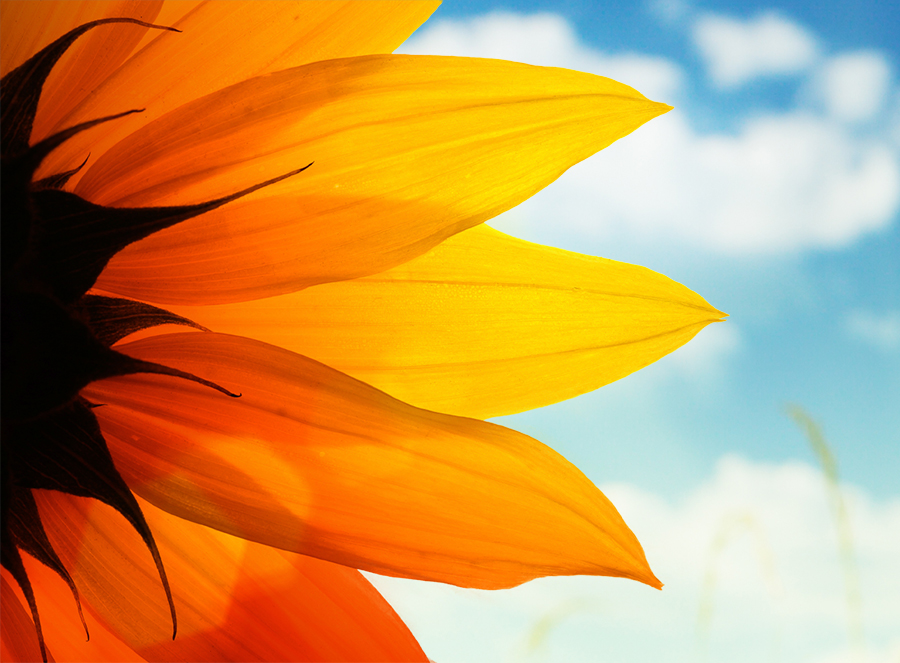
To tell Remask what you want to get rid of, use the red fill bucket.
In this case, I’m removing the background around the flower, so I will fill it with red.
Once you have filled the area you want to get rid of, click the “Compute Mask” button. You will then see a black and white mask.
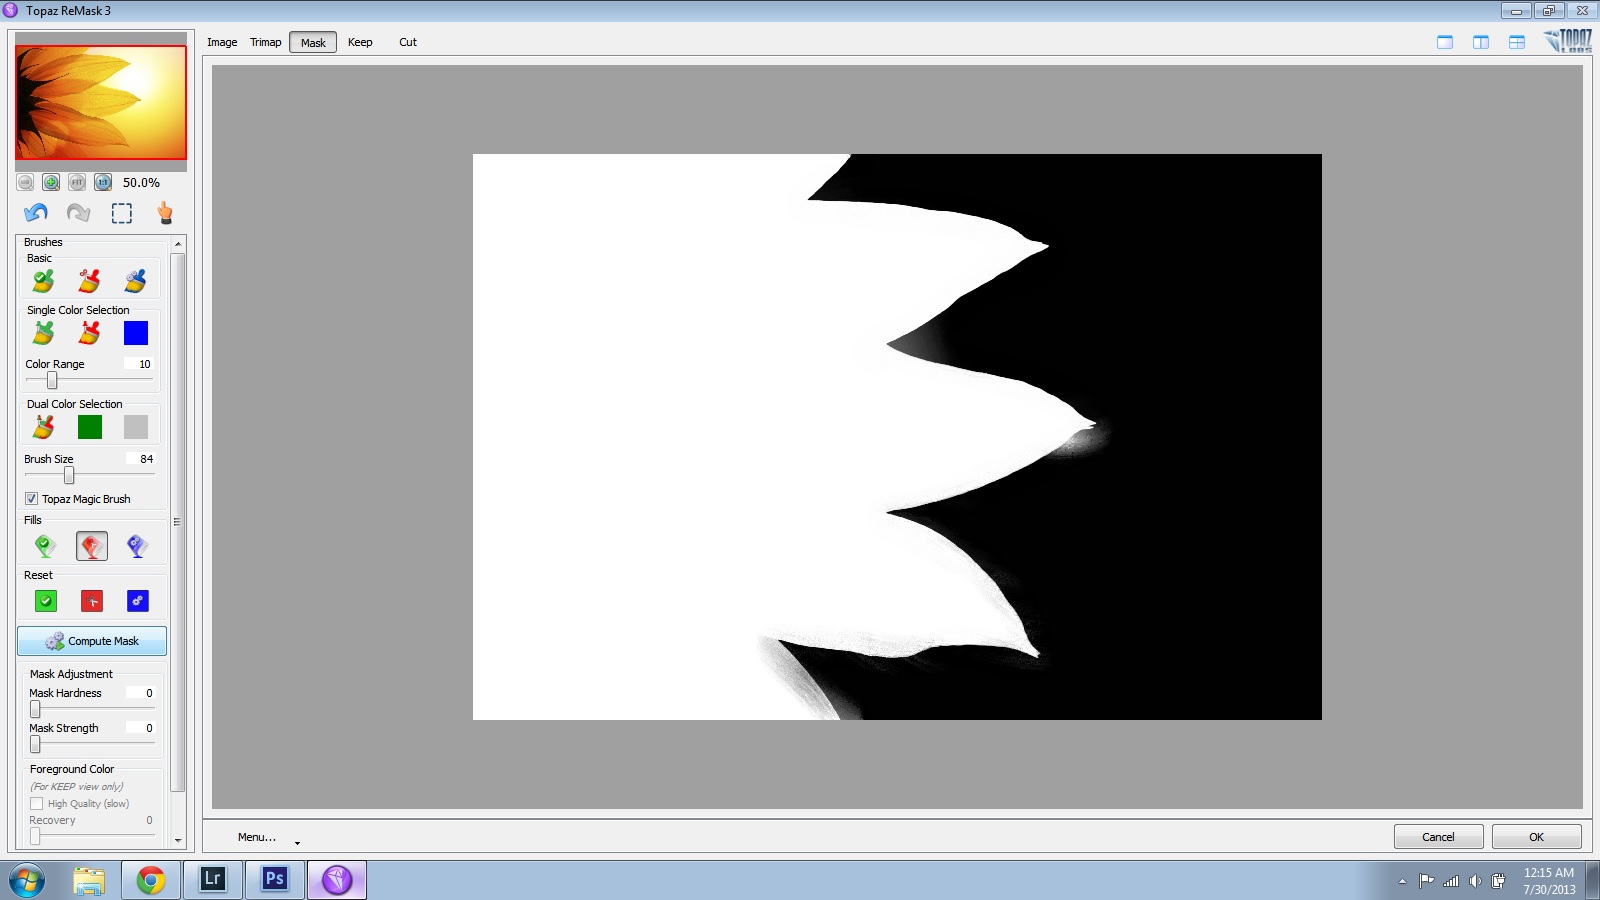
In this example, you can see that there is a bit of fuzziness or contamination. We can fix that.
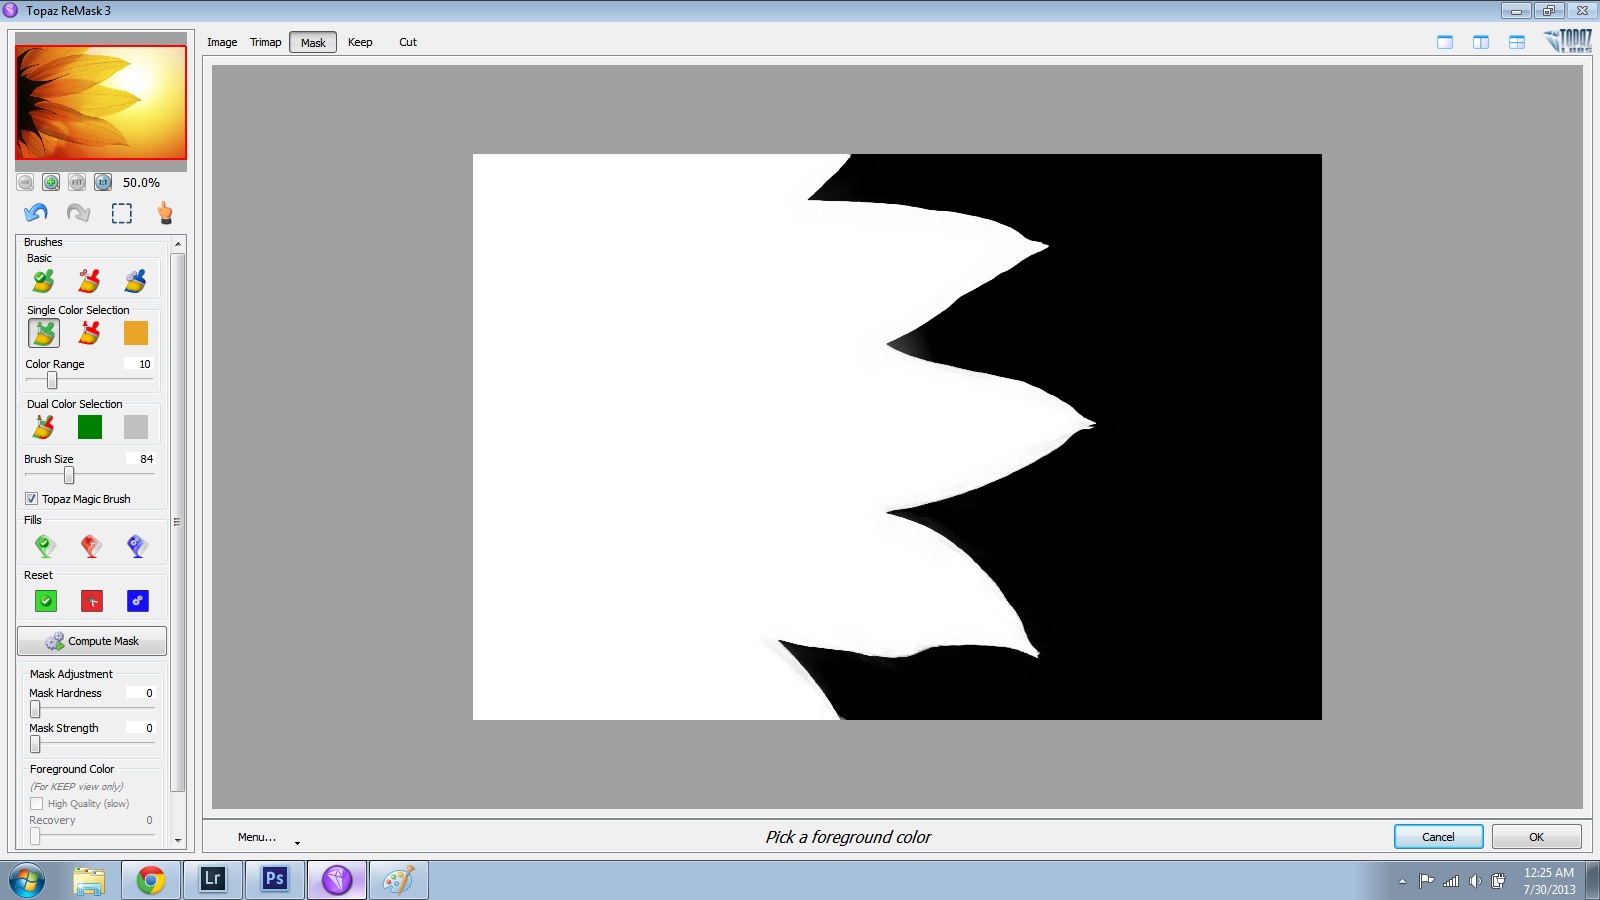
Choose the red brush (not the paint bucket this time). Make sure that the “Topaz Magic Brush” is clicked on. Then, just click the fuzzy parts in the background that you want to remove. Topaz Remask will recalculate those parts.
If there is some black contaminating the white areas, just switch over to the green brush and do the same.
After clicking a number of times, I now have a clean mask.
You can now click on the “Keep” tab in the upper part of the screen to view your photo without the unwanted background.
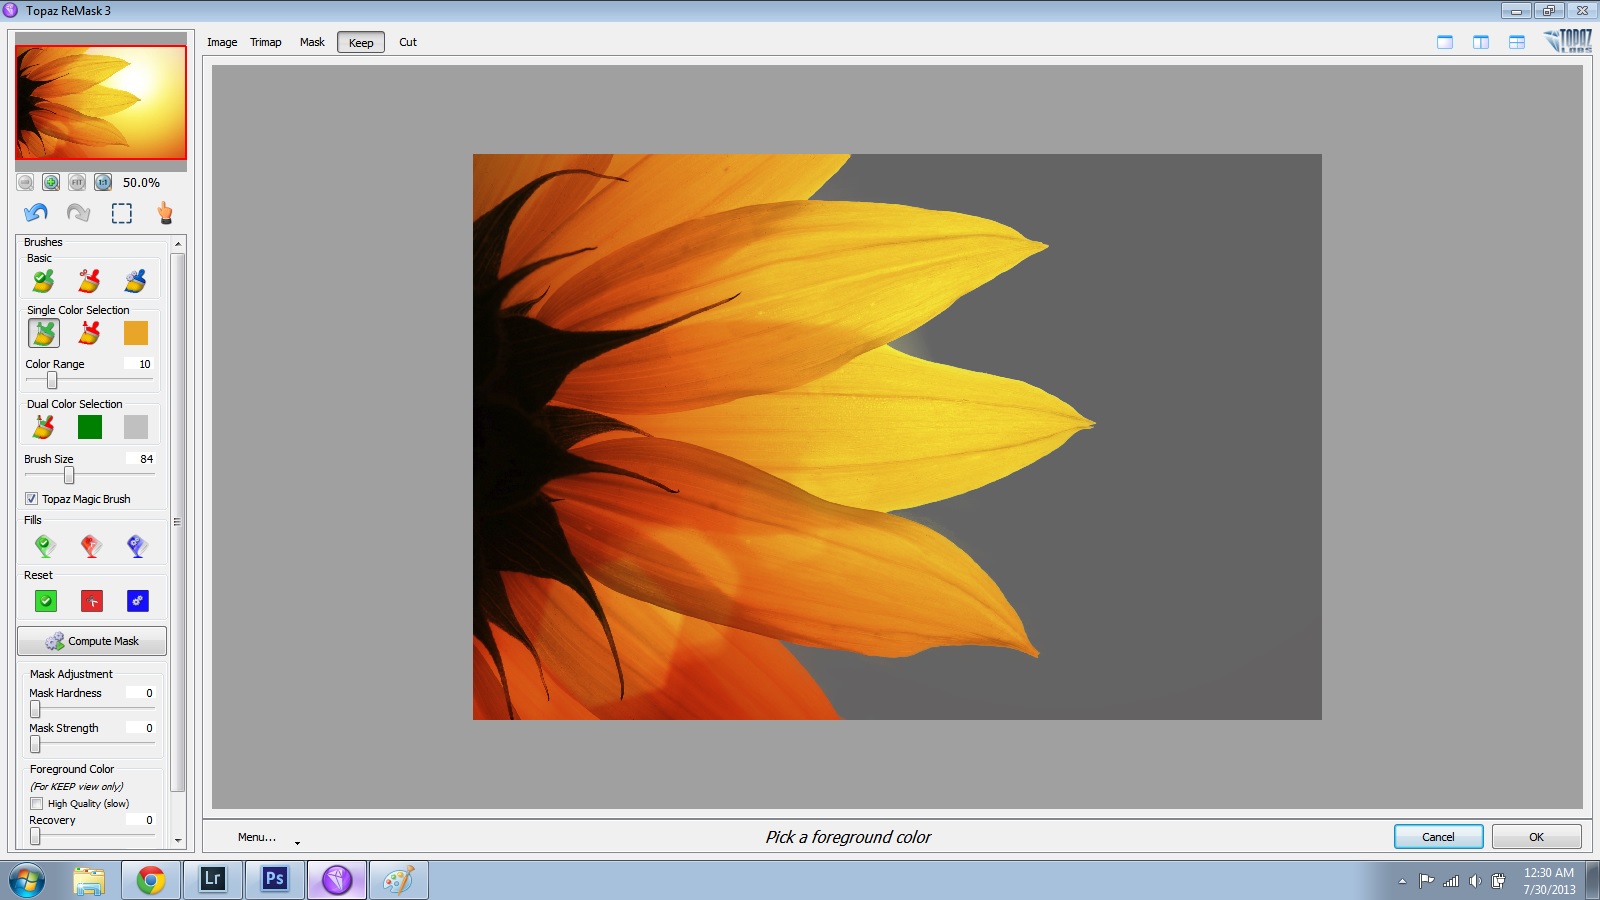
If you want to view your cut-out photo against a different background color, you can go to “Menu” and then “Set Background Color”.
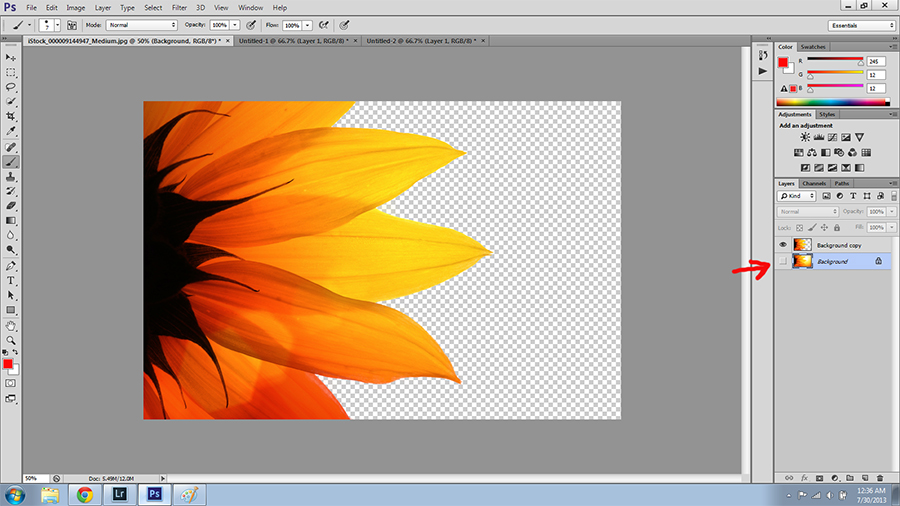
Now, you can just click the “OK” button to process your mask and open it back up in Photoshop.
You will see that there are now 2 layers. The Background layer is the original unmasked photo and the 2nd layer has your masked version. I clicked the eye next to the background layer to make it invisible so you can see the masked layer.
Now, you can place your masked photo over a different background. Here’s mine. A bit cheesy I know, but you get the point.
Topaz Detail
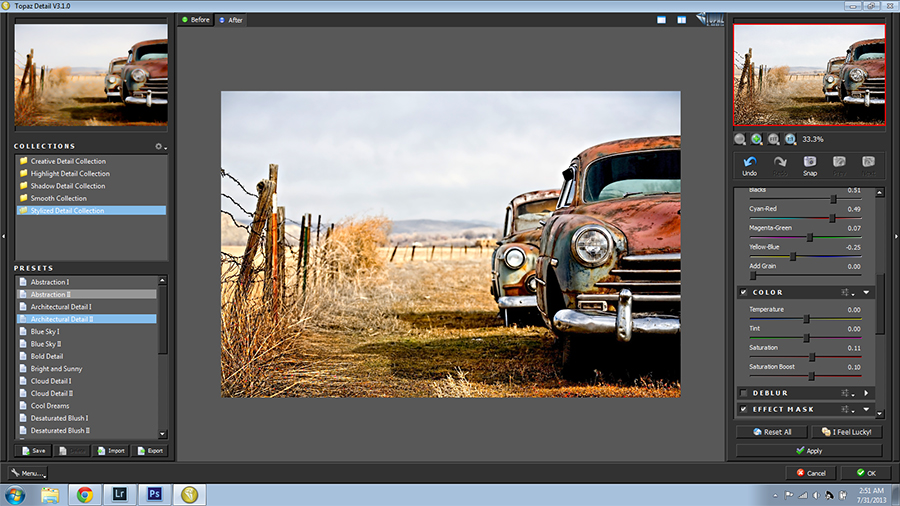
Topaz Detail is similar to Topaz Clarity in some ways, but it is more specifically for detail enhancement and sharpening. In all honesty, it is one of two Topaz plugins that I just don’t use. I prefer bringing out details with Topaz Clarity and sharpening in Lightroom.
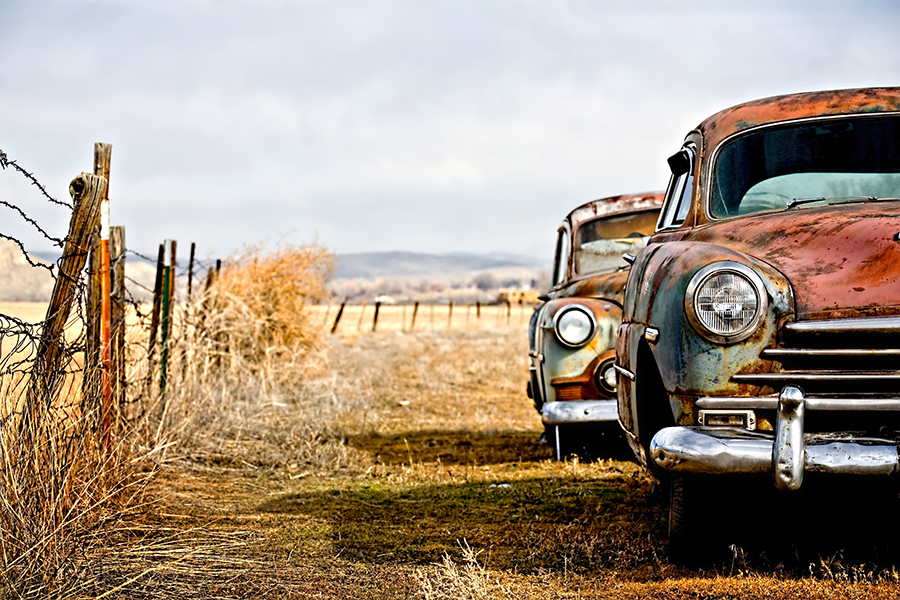
Here is the above photo processed with a preset in Topaz Detail.
Topaz Simplify
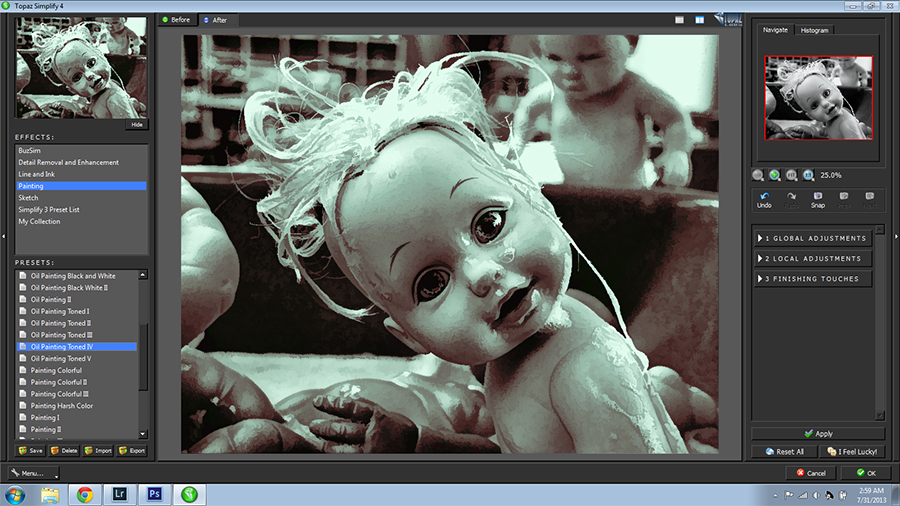
Topaz Simplify is a very fun plugin which works much like “Filters” in Photoshop, but does a better job of it. You can turn your photos into digital oil paintings, watercolors, fake sketches, remove unnecessary detail to make your images more abstract and lots more.
Here is a result, which I am in love with, created with a preset plus some tweaking of the sliders on the right.
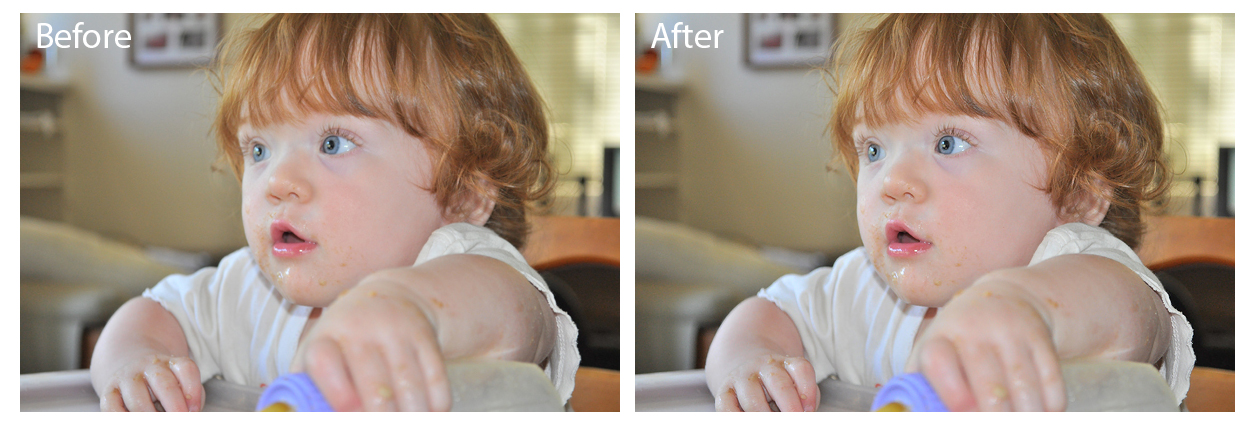
Topaz InFocus
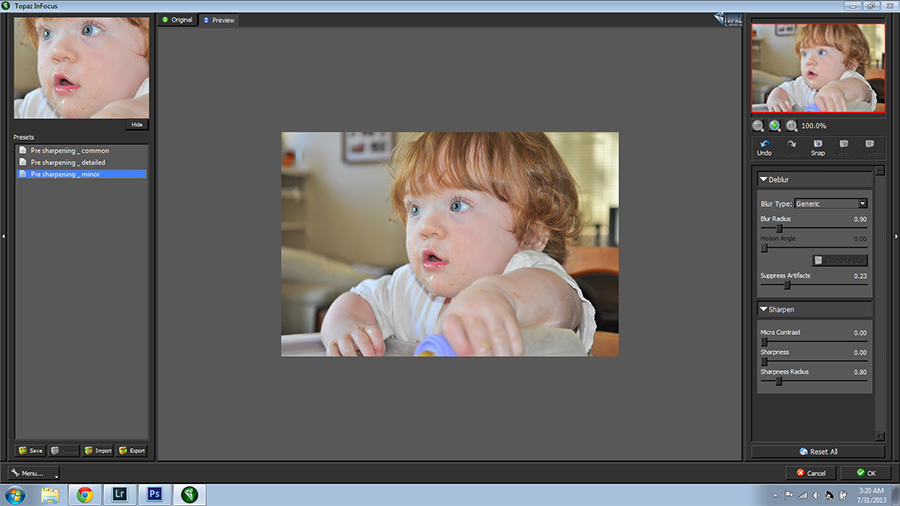
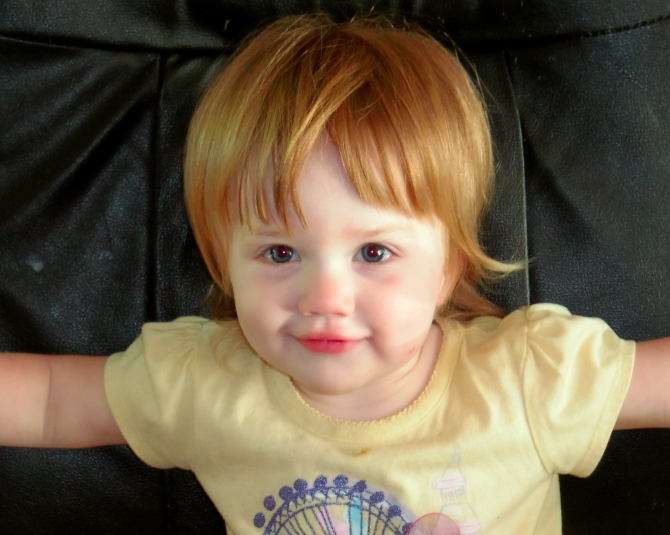
Topaz InFocus helps to lower or even eliminate blur and soft focus shots. In the following example, I used “Presharpening Minor” to subtly sharpen this photo of my daughter. I didn’t want to make the focus too sharp and harsh.
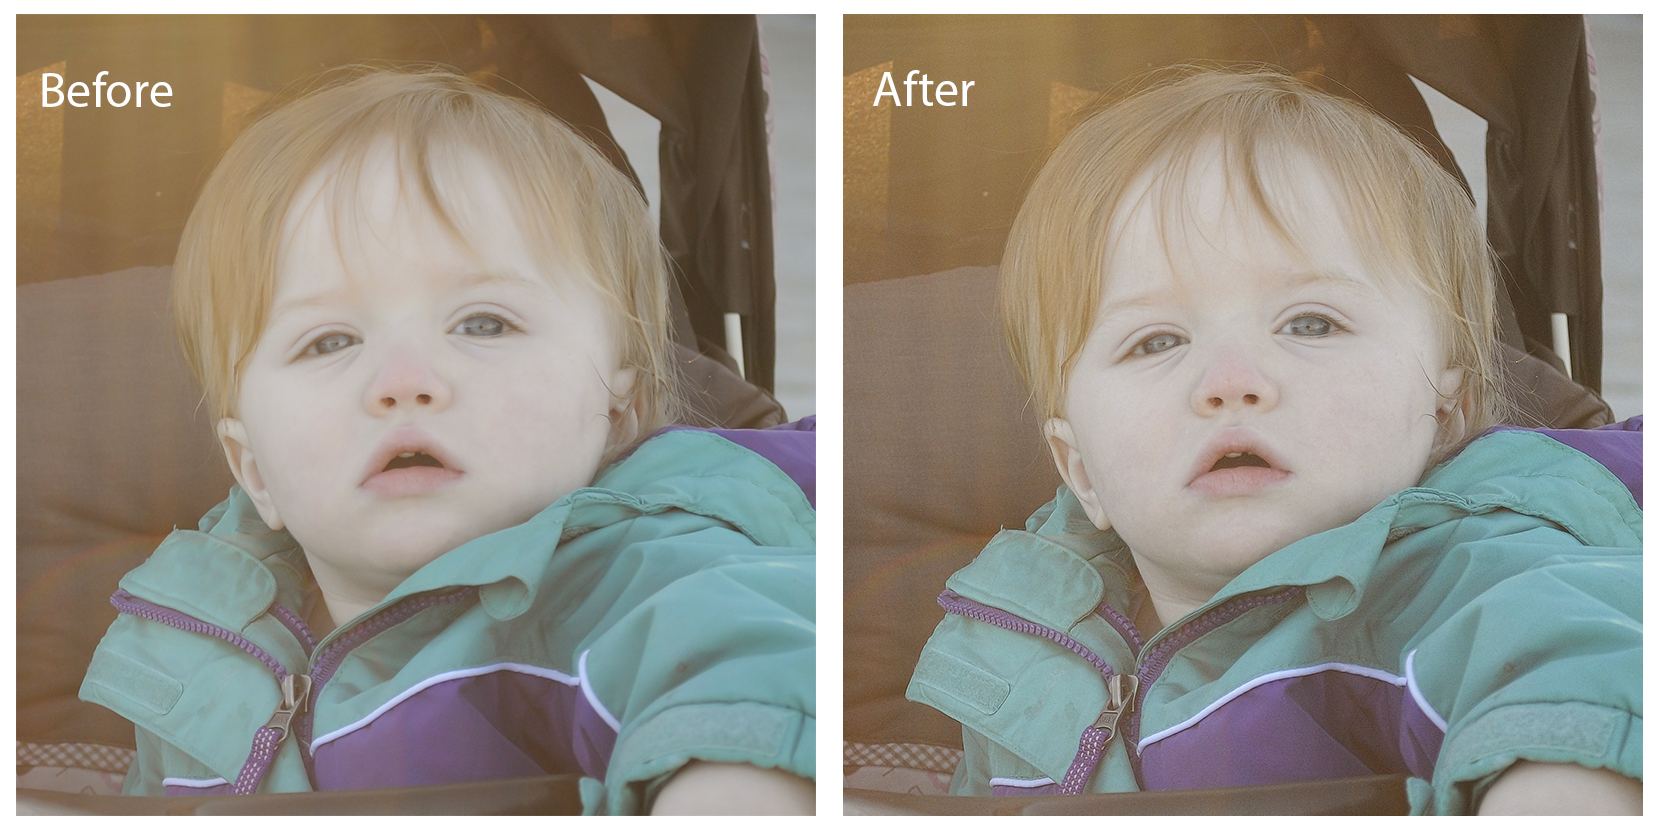
Here is a more dramatic before and after shot of my other daughter. There is some noise generated by a stronger focus adjustment, but this can be fixed in a noise removal program such as Lightroom or Topaz DeNoise.
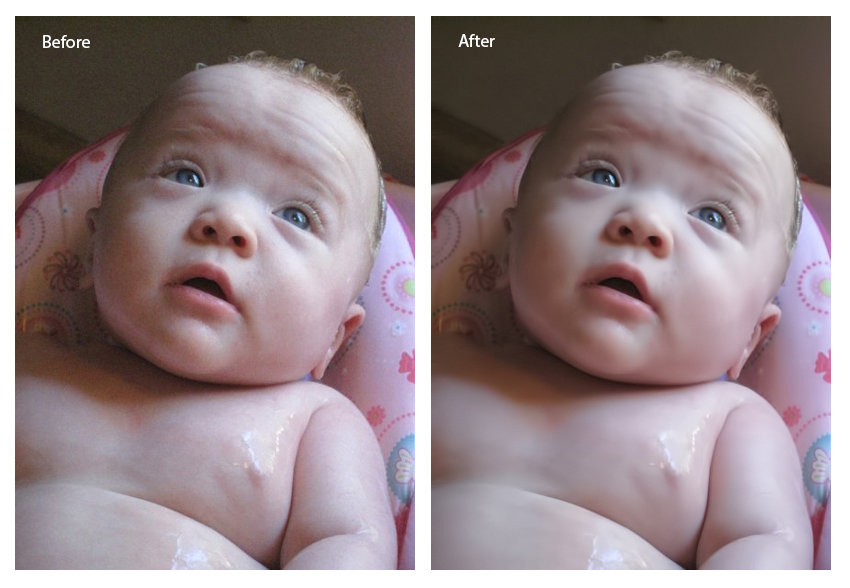
Topaz DeNoise
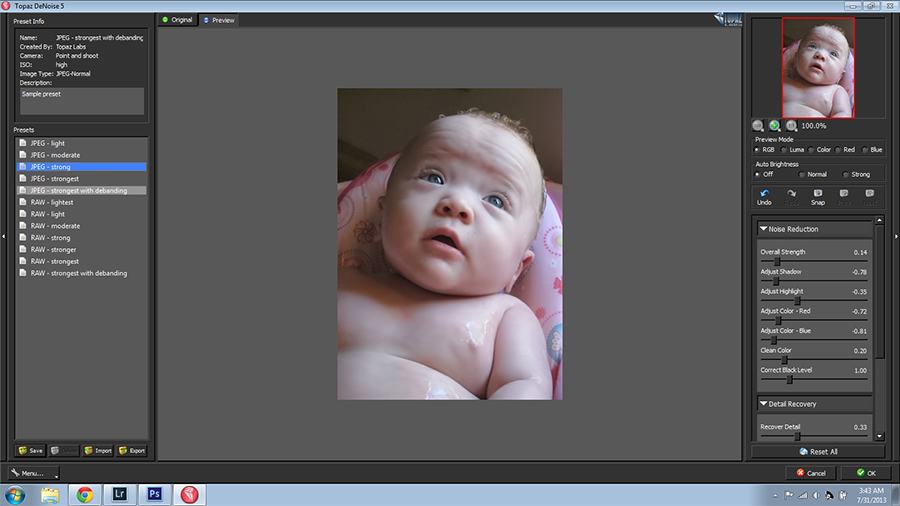
Topaz DeNoise does what it sounds like it does. In my experience, it’s best for very heavy noise reduction. I prefer Lightroom for more subtle noise reduction.
Here is yet another photograph of one of my daughters, which was taken with a point and shoot camera in low light. You can see that the before photo is very noisy. The after photo is much improved although missing a small amount of detail However, this level of noise reduction in other photo-editing programs usually removes even more detail than this.
Topaz Star Effects
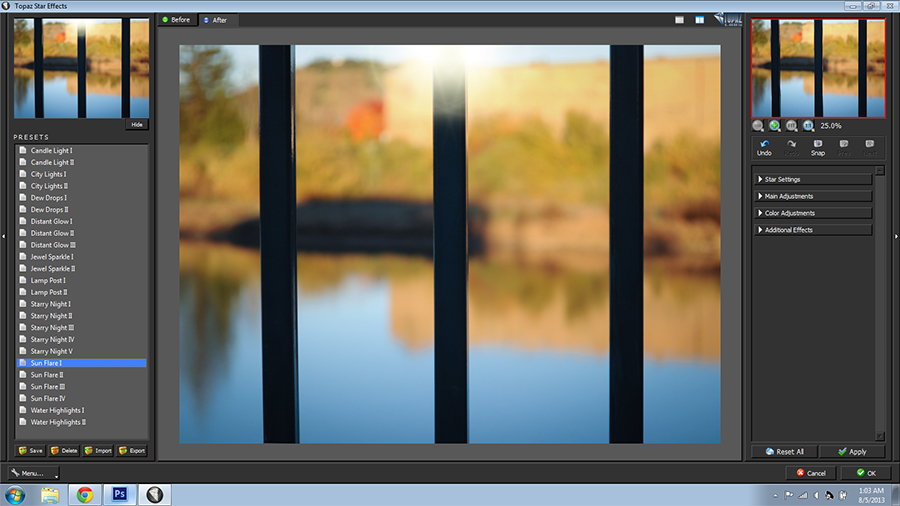
Topaz Star Effects was developed to add realistic star and sparkle effects to your photos. However, I have tried it on many different photos and haven’t had any good results yet. Perhaps I just haven’t found the perfect photo for this plugin yet? I don’t know. I do know that it’s the one and only Topaz plugin that I just wouldn’t recommend.
Since it comes with the bundle, perhaps it’s worth your time to download it and give it a try with all of the rest.
Topaz Clean
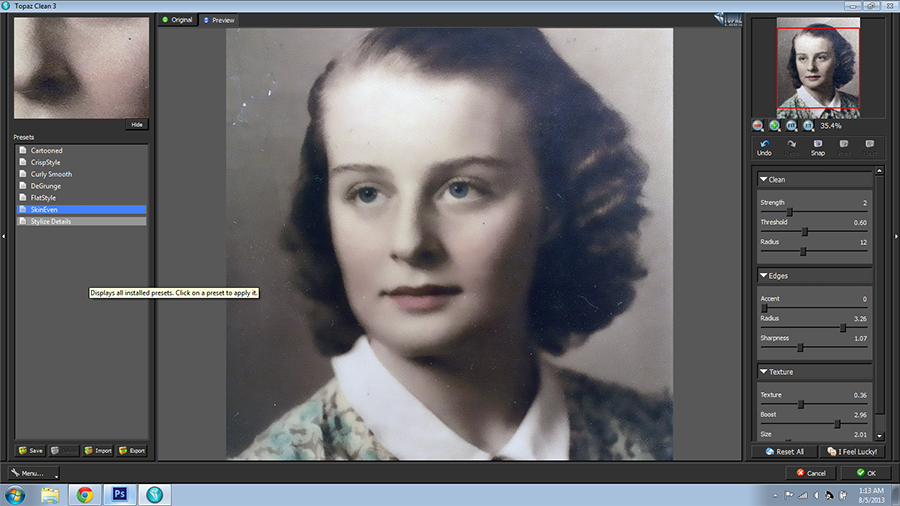
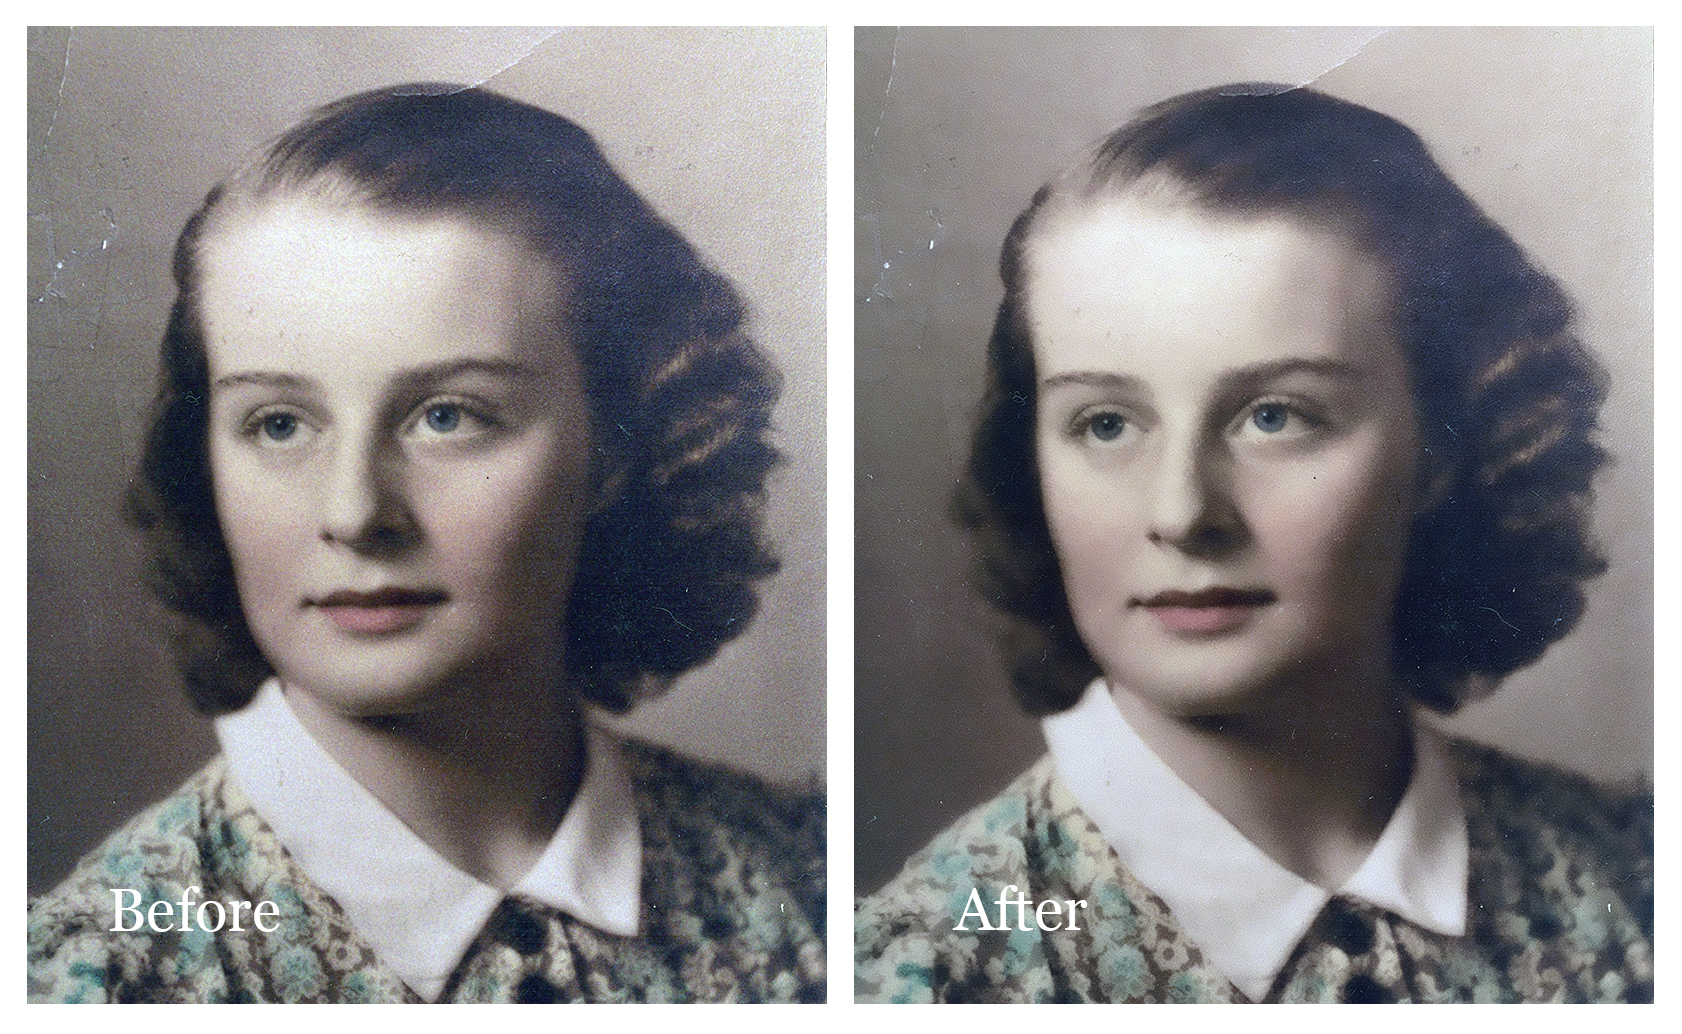
Topaz Clean allows you to clean up portraits and other subjects without losing structural detail. In the following before and after example I used the “Skin Even” preset, which removed quite a bit of the noise from the photo without removing a lot of detail.
This photo of my grandmother is something of an extreme example, and no software is going to remove every flaw from a photo with as much damage as this one. However, it’s a wonderful starting point prior to manual restoration.
Topaz DeJPEG
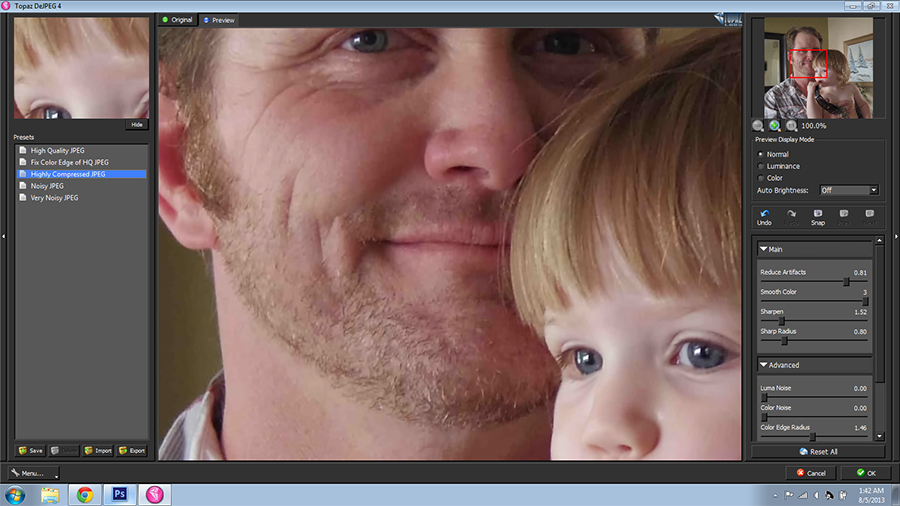
Topaz DeJPEG improves JPEG image quality to a large degree by removing noise and compression artifacts. It’s a great tool for improving photos taken with camera phones and cheap point and shoot cameras.
Here is the example photo at full-size. It doesn’t have terrible quality overall and it was shot with a decent camera. However, it was a quick low-light family snapshot and it is fairly low-quality when zoomed in.

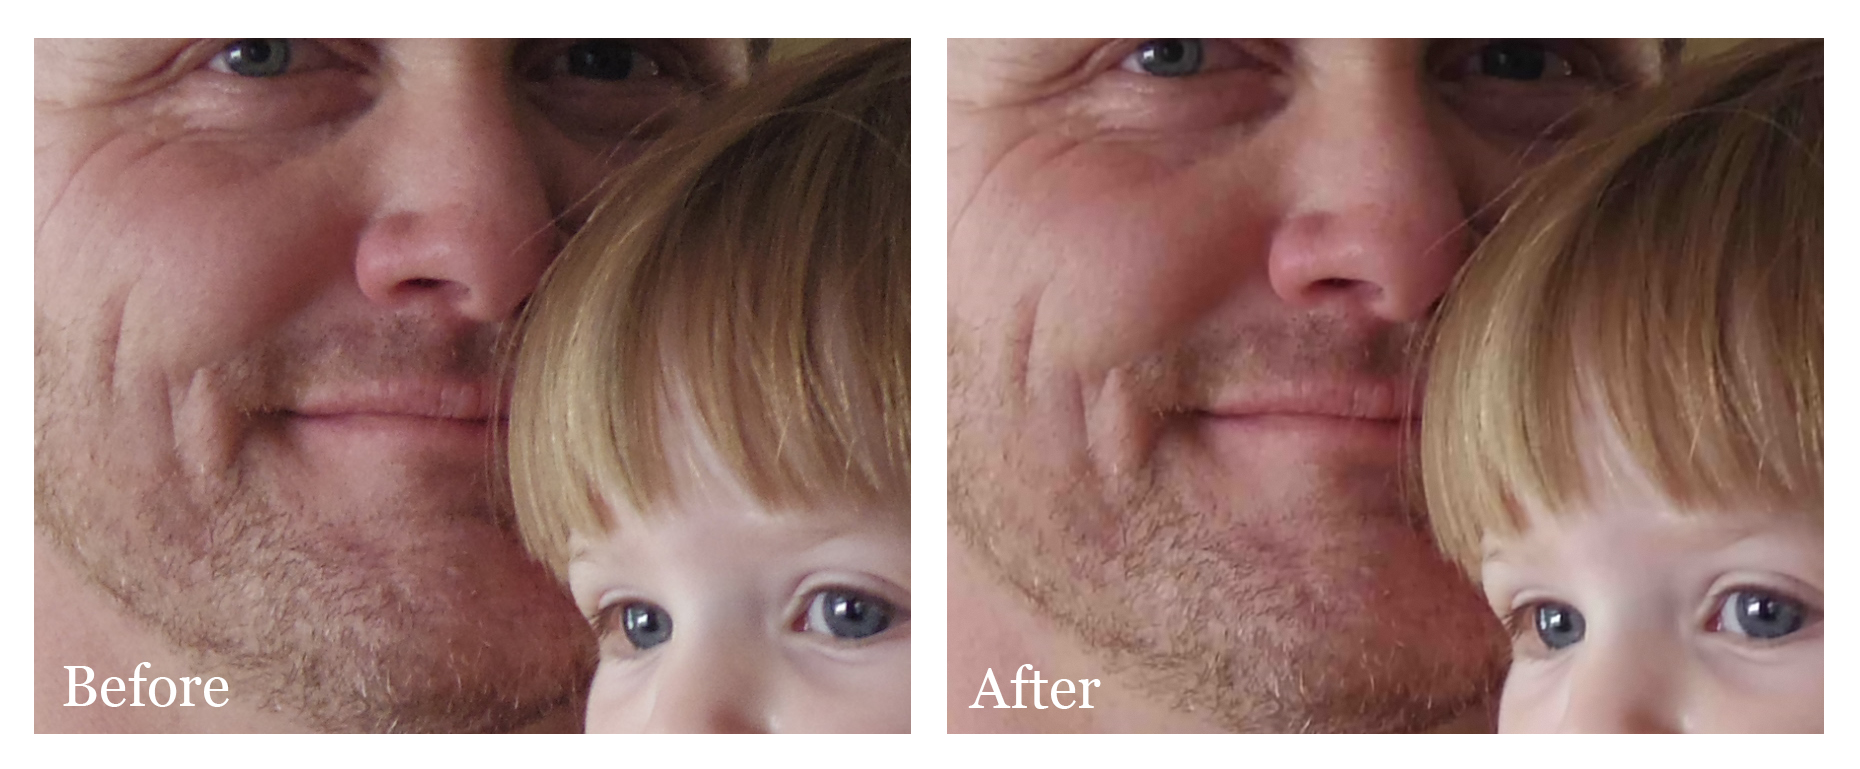
Now, here is a detail of part of both faces before and after processing with Topaz DeJPEG. You can see that their skin and eyes look much cleaner and there is no loss of detail.
Topaz ReStyle
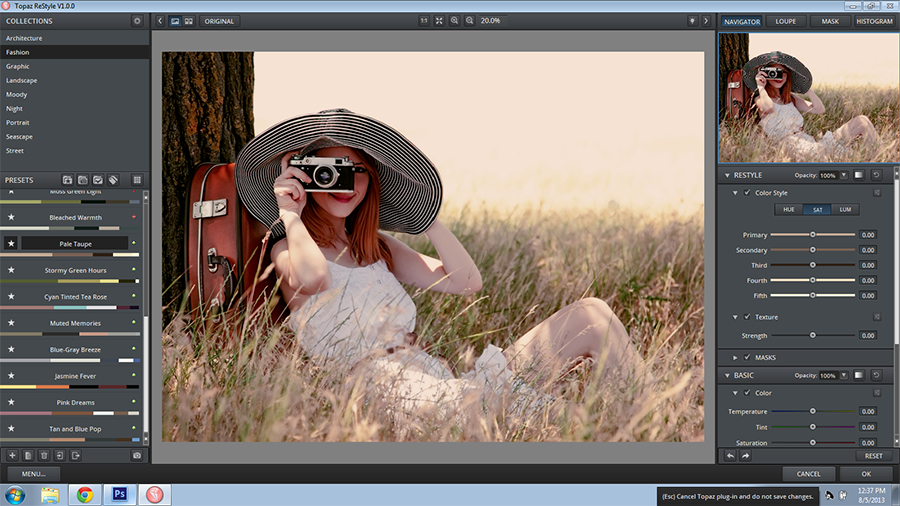
Topaz ReStyle provides limitless color restyling of your photos. It has over 1,000 photographic color styles presets to choose from! You can also make your own or install presets that you’ve downloaded.
This photo of my daughter was processed with ReStyle.
So, that concludes our brief overview of Topaz Labs plugins. Again, you can download a free trial of every plugin that comes with the bundle. Enjoy!

 Free Download – Deeply Matte – Photoshop Actions
  Free Download – Gorgeous Redheads – Photoshop Actions
  Free Download – Monochrome Landscapes – Lightroom Presets
  Free Download – Pinhole Photography – Lightroom Presets
Great information. Will Topaz and these plugins work with Photoshop Elements 12?
Thanks.
Hi Bob,
I wasn’t sure of this actually, but I looked it up on the FAQs at Topaz Labs. Yes, they are compatible with Photoshop Elements 12.
Thanks for asking
Rachael
I’ve recently installed PSE 12 & have tried to download some topaz plugins but have been unable to, I click download then either save or run then I hit a brick wall. Not sure what I’m doing wrong
Hi Danny,
I’m not sure what the problem may be, but Topaz tech support is really helpful. I suggest contacting them. I wish I could be of more help.
Rachael
Yes, Topaz does work with Photshop Elements 12. That is what I use and the ones I have work great, Topaz is accessed from the Filter menu
Great Tutorial, Love it.
Hello,
I’m happy you love it
Your article is really good, however, I have a problem. When I click on photo-edit in-fusion express 2- an small window comes comes. it’s supposed to have the plugin in it so I can select one. There are none there. When I go into my computer to the Topaz folder the plugins are listed.
Do you have any ideas as to why this might be happening? I use LR5.
Hello Kalena,
I’m sorry, but I have no idea! I do hope you get it figured out though.
Rachael